ReSharper is an extension for Visual Studio that provides a lot of quality-of-life improvements over the initial VS user experience. It was initially made for C# (hence the name), but also exists in C++ ! If you never used it, but know competing products like VAX (Visual Assist X) for example, you basically know what ReSharper is.
It happens pretty often that, working on a C++ project, I want to make a new class (separated in two files : a header file and a source file) based on a kind of template, like they should all follow the same basic structure, have the same copyright disclaimers at the beginning, then start implementation surrounded in a specific namespace, etc…
Visual Studio in itself is pretty limited in that respect. And to be honest it’s very possible to just copy-paste existing files and make the necessary arrangements each time, but it becomes kind of tedious and boring over time. Turns out, ReSharper happens to know how to do this kind of thing : behold the ReSharper File Templates ! Unfortunately, it’s pretty complicated to use at first and documentation is scarce (at the time I’m writing this).
So here’s a quick guide on how to do it. It assumes you have ReSharper up and running (for brevity, I skip the part about installing it).
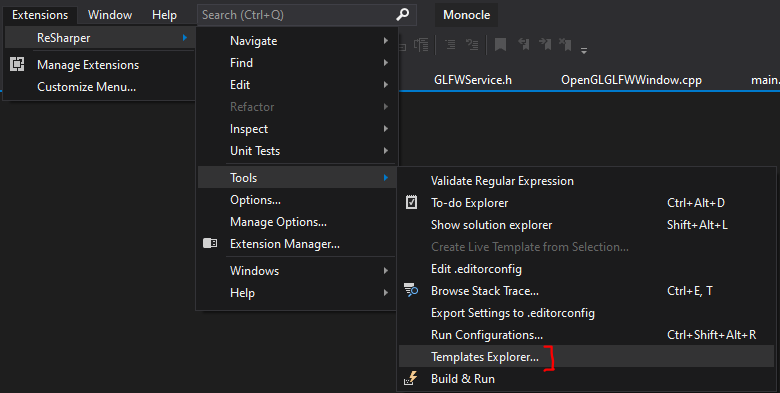
First, in true Visual Studio fashion, you have to go three context menus deep in the ReSharper tab to find the Templates Explorer :
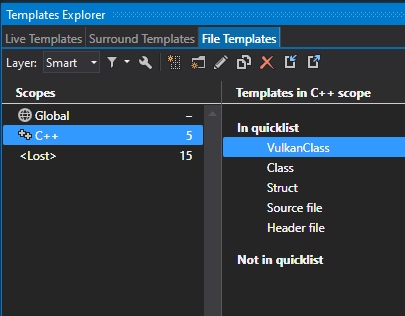
Then you have to select « File Templates » that will give you a list of all the existing ReSharper templates :
Now, let’s say that for the purpose of my template, I want to create a class that is named the same way than the files (Class will be defined in Class.h and Class.cpp). How to do that with File Templates ?
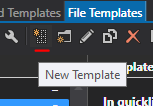
Well first of all create a new blank template :
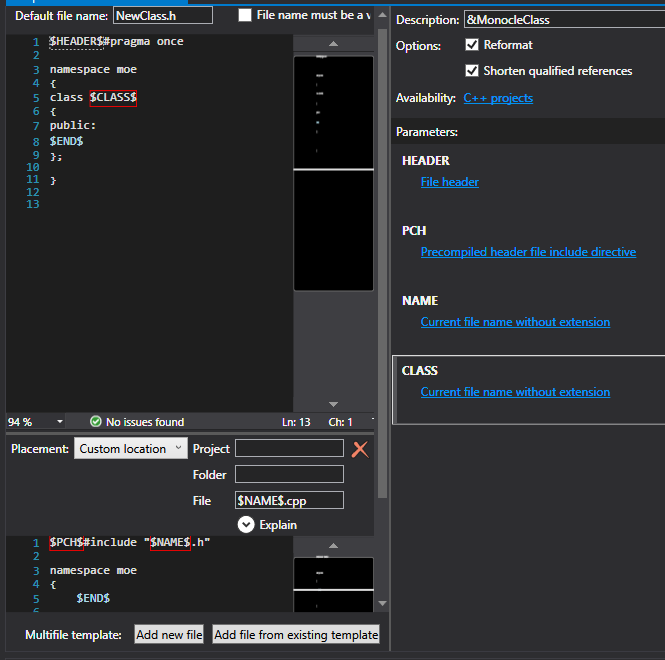
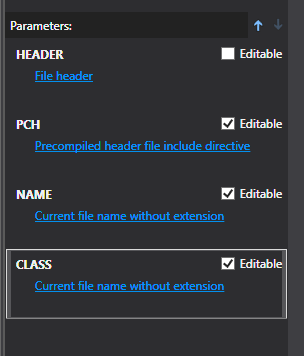
It’s going to open a pretty… empty template. But above all, know that ReSharper has an extensive list of parameters that can be useful in any file template you can create. They are like kind of variables which values can change based on the context. We’re going to use them. Here is a short but nonexhaustive list.
First, when you want to name your class « MyClass », know that the value « MyClass » is going to be stored in the $NAME$ template parameter. Using the ReSharper default Class template is usually a good way to start. You can then get to the basics of what should be in every one of your files.
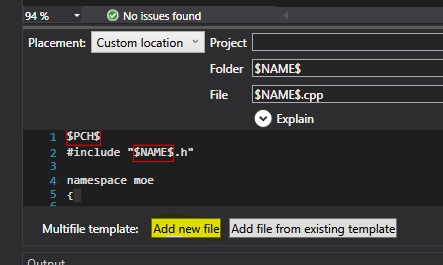
Every time you wrote something encased in dollars (like $HEADER$), ReSharper is going to recognize it and display it in the Parameters list on the right. You can then customize any value that you want to put in it, using ReSharper macros for example.
Then, since we want to create the .cpp file too, you have to hit the « Add new file » button at the bottom to create a new one. Funnily enough, for the header, you can keep the default NewClass.h (ReSharper will be smart enough to make the replacement), but for the cpp file, you have to name it with the variable $NAME$.
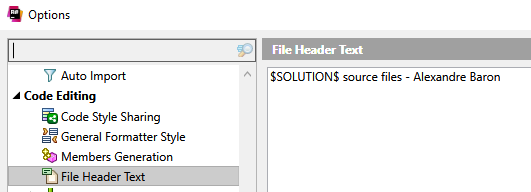
There are two macros that are a bit special : « File header » and « Precompiled header file include directive ». The File header macro will be set to the contents of a custom file header you can define in ReSharper settings and use for all your templates. It allows a fair amount of customization thanks to variables you can insert into it.
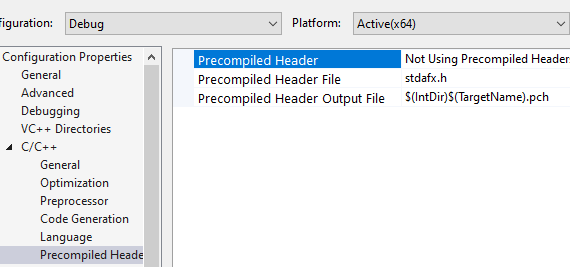
The precompiled header macro depends directly on whether or not your Visual Studio project uses precompiled headers or not. It if doesn’t it will be empty, so if that’s something you would like to have, just make sure it’s enabled in your project’s properties :
Once you’ve done all that, you can save the template (weirdly, on my machine, templates get saved only by the « Save All » button, not the Save button), and start using it for real. All you have to do is right-click somewhere in your source tree and under Add, select the template you just created. You will notice that by default, it doesn’t appear in the shown « quick list » :
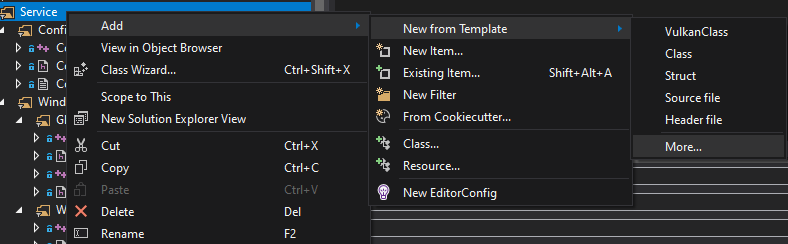
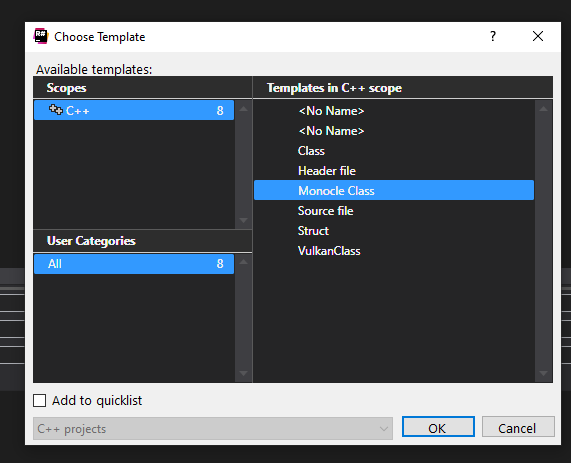
In order to make it appear, just click on More. That should let you select it in the list, then don’t forget to tick « Add to quicklist » to reuse it more easily in the future.
Finally, you may wonder about how to set the caret position when ReSharper is done generating the template. It is quite annoying to want to start typing within the namespace brackets for example, but be put outside of them.
Turns out it’s pretty easy : you can use the special $END$ template parameter for that. It’s going to set the final position of the caret, so that your cursor can start at the right position. Neat !